Hammer Modeling
This is not about how to use Hammer itself. This is about how to efficiently model levels.
I used these resources to learn Hammer:
- the official Hammer docs
- Trouble in Terrorist Town mapping reference
- video series on making a house by WorldOfLevelDesign and the text version
- TopHattWaffle Hammer tutorials
- googling any question I had
This tutorial is focused on making TTT maps, but it can be generalized.
Setup
- Mount Counter-Strike: Source into Hammer. This lets you use textures and models from Counter-Strike.
Fast Testing
I use CompilePal instead of running the map compilation through Hammer. It’s faster, lets you save different configurations, and doesn’t lock up your computer.
Other tips:
- Keep Gmod running as you model, with a TTT game going. When you compile a new version of the map, you can immediately open the console (
~) and runchangelevel ttt_yourmap, or hit↑Enterto rerun it. You may have to enable the dev console in settings > keyboard > advanced. - Set these in the console, they’ll make it easy to get to a round start when you reload the map:
ttt_debug_preventwin 1ttt_preptime_seconds 1ttt_firstpreptime 1
- Use
ttt_roundrestartas needed. - Compile with
vvis -fastfor testing, but be aware that it will produce strange lighting artifacts and shadows where there shouldn’t be.
Level Blocking
- Add a skybox immediately. It looks better than the black nodraw cube around your level geometry, plus you’ll start getting an intuitive sense of how the light will fall and which parts will be in light and shadow. I always throw in a
light_environmententity after setting the sky name in the map properties. - Start with dev textures, but add some variance. I like orange for buildings you can enter, the white/gray reflectivity indices for large walls and background objects, and the dark gray grid for floors.
- When making displacements, don’t select the entire brush when you click Create Displacement. Use
ShiftAto only select the face you want to convert into a displacement. Otherwise the compiler will squawk about stitching errors and face alignents. - All vertices in Hammer need to be aligned to a 1-inch grid. If they’re not, they’ll move around when the map is compiled, and you’ll end up with a roof full of seams that get you stuck if you walk on them.
- Use visgroups to sort level geometry into categories you can show/hide at will.
Optimization
The main thing: Understand how visleaves work, and how complicated shapes will slice the air around them. This can be avoided by converting them into func_detail entities (shortcut: select them and press CtrlT).
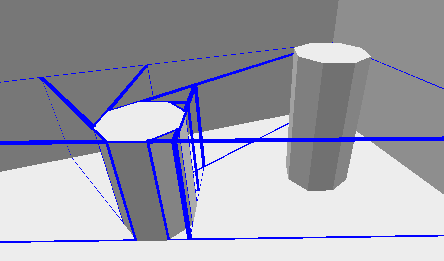
Above: two eight-sided cylinder brushes, with the right marked as a func_detail.
Pretty much every brush that doesn’t make up the backbone of the world should be marked as a func_detail. Different visleaves should only reflect different areas, like different rooms or floors.
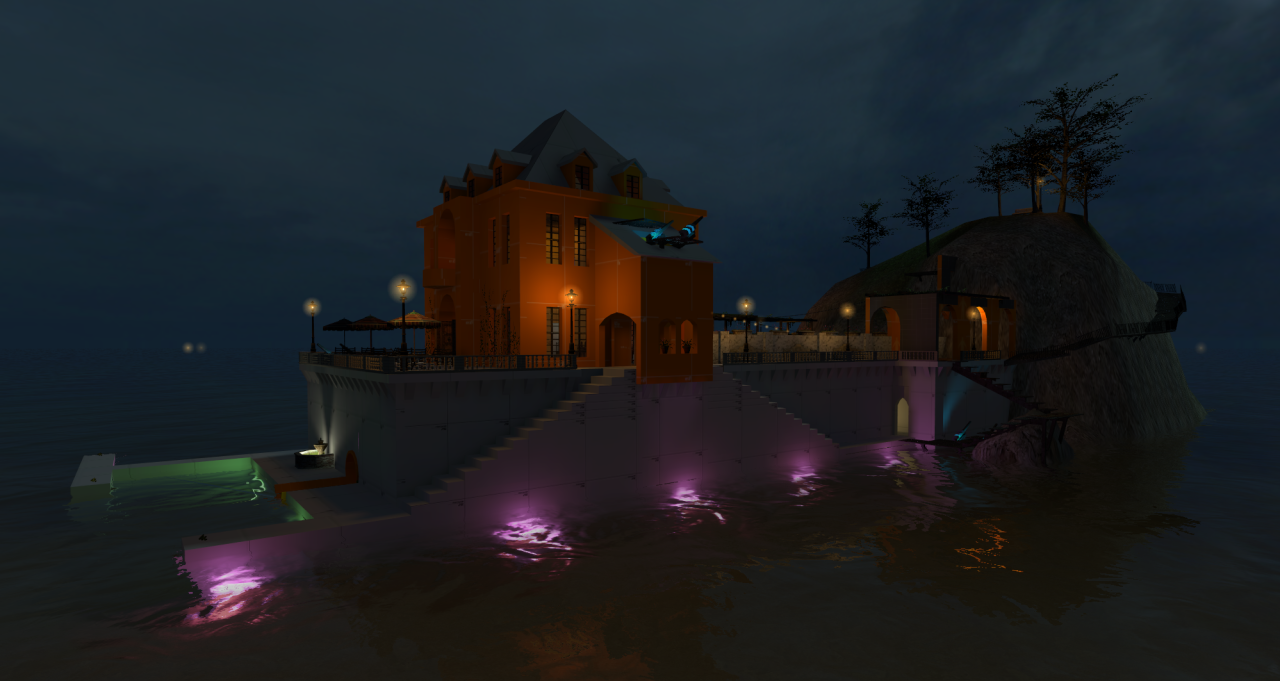
The map in the cover image, ttt_PigIsland_nightswim, takes less time to compile on high-quality settings than my first and smaller map, ttt_ManHouse, does on extra-low. That’s because I didn’t know how visleaves worked when I made it.
Fun fact: I can’t even compile ManHouse, GroverHaus or OldChurch on anything but FastVis because the visleaves are so screwed up.
General optimization reference
Lighting
HDR
I’ve never compiled a map with HDR, but I recommend against using it. It’s very easy to misconfigure, which results in eye-watering bloom in areas where it shouldn’t be.

Constructing Lights
If there’s a chance players will be looking at the bulb head-on, I add an env_sprite with the default sprite. Just make sure you set the render mode to “World Space Glow.”

A typical stack for a ceiling light: the light model, a sprite inside of it (since it will show outside the model) and the actual light a distance away. I could have moved it further away because the patch of ceiling right around it is very bright.

Other Tips
- Never use a pure white light unless you’re making a hospital or something.
- Read Valve’s lighting psychology post.
- Named sprites always start invisible, unless you check the “Start On” flag.
- Named lights will generate versions of baked lighting for if they’re on or off. Hammer assumes they’re referenced in the IO system, will be switched on and off at runtime, and generates all variants.
- If you have multiple differently named lights hitting the same surface, your lightmap sizes and compile times will grow at O(nn) from calculating all permutations. Be very careful.
Sound
ambient_generic is what every game sound uses, and it’s busted. Some sounds, despite having “loop” at the end of their name, do not loop. In ttt_PigIsland, waterlap_loop has to be manually repeated every 14 seconds with a logic_timer. More info in the docs, as always.
Advanced Modeling
or, how I learned to stop worrying and love the carve tool
Everyone always says don’t use Carve, it’s bad. But they never say why. It’s because if you carve something other than an axis-aligned box, it does terrible things to the geometry, messing up visleaves and potentially misaligning vertices. But it can be very useful.

Say I want to make a pipe through this wall, and I want it to be hollow so people can walk through it, like in ttt_PigIsland.

The naive approach: stick the pipe through the wall and hit Carve.

Looks fine, until we look at what it’s done to that wall.

bad
If we want that wall to split visleaves, we’re out of luck. Recall how objects cut space around them. We can make it a func_detail, but there’s a better way.

- Carve a square into the wall the size of the cylinder
- Carve that with the cylinder
- Mark the Bad Square as
func_detail

Much better. The cut geometry is isolated and you can move around the rest of the level as you wish.